Capcut
Company: Bytedance Pte. Ltd
Number of installations: 100M+
Reviews: 4.13M
Score: 4.3
Description:
What is Capcut?
Capcut (previously known as Viamaker) is one of the newest video editing apps that is available to download for free both in the Android Play Store and Apple’s App Store. Bytedance Pte. Ltd is behind the application (the parent company of TikTok) and as their tagline goes “Capture the moment and cut”, it’s easy to see where the naming convention comes from. Thanks to the many different features found within, budding videographers and filmmakers have the necessary tools to create great new videos that can be exported in HQ video.
What are the basics?
Capcut is a video editor that packs a lot of punches, especially considering the fact that as a user you don’t have to part with a single cent of your money. This is the case for both the Android and iOS operating systems.
The application is 94MB in size for Android and 167.9MB for iOS.
What is the interface like?
It is very apparent from the get-go, that the developers had ease of use in mind for the users of this application. When you’re first starting, you’re greeted with a fairly basic layout with only a handful of options to navigate through.
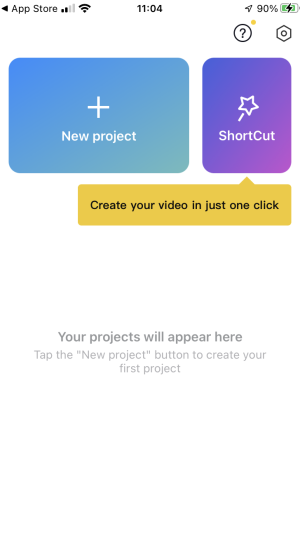
There are really only two buttons to toggle between:
- New project
- Shortcut
The top corner is reserved for the options section and right next to it is the Help Center. In the Help Center, you can find a number of video tutorials covering different options and techniques available to the user, along with a FAQ section.
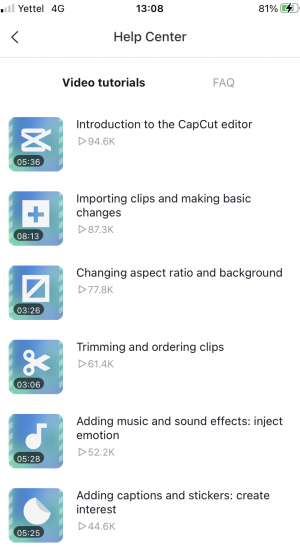
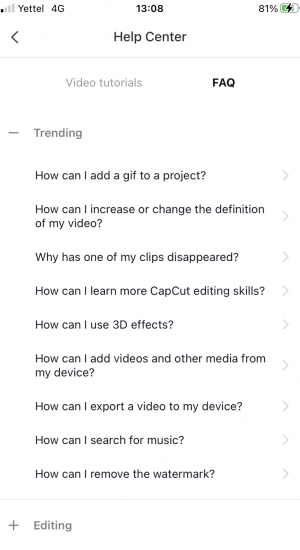
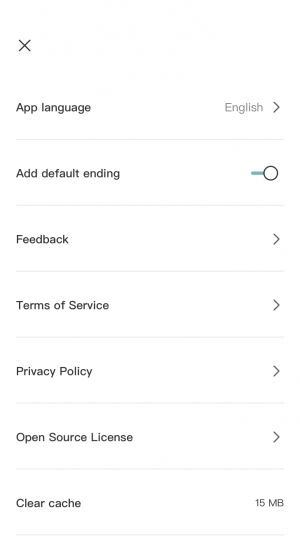
In the Options section, you’ll find features that help with some of the in-built functionality of the app, such as language, feedback, terms of service, etc.
What is the difference between New Project and Shortcut?
Simply put, if you want to do any proper editing, utilising all the available features, then you’ll be selecting the New Project button. However, if you’re keen on letting the application “do its thing” then you can opt for the Shortcut button, however, this (at least in our experience) has proved to be less of a shortcut and more of a confusing mess.
When you use the Shortcut button the app engages the in-built AI, which analyses the footage and offers up a selection of effects (filters, cuts, transitions) that it thinks will make the original footage stand out more. In most cases, depending on the choice of effect, the original footage is shortened, music is added, overlay effects are added and interesting transitions are included.
It is also worth noting, that choosing the Shortcut option takes a little bit of time (especially the first time you import your footage) which is an indicator of just how much processing is going on. As this was tested on a slightly older phone (iPhone 7), it is possible that this process takes less time on other (newer) devices, but it will still take time.
How do you go about starting a New Project?
Unlike the Shortcut feature, selecting New Project brings up your default video folder from which you can select any number of clips you wish you splice together. Once you’ve made your choice you will then be presented with the timeline along with all the parameters that you can tweak located at the bottom.
These parameters are:
- Edit
- Audio
- Text
- Stickers
- Overlay
- Effects
- Filters
- Format
- Canvas
- Adjust
As a default, you will also see (just under the footage) the option to +Add audio.
By clicking on this, you’re given a new set of parameters with which to include the desired audio. These are:
- Sounds
- Effects
- Extracted
- Voiceover
When you click on Sounds you’re presented with a number of audio options with which you can enhance your videos.
- TikTok original sounds
- Your sounds
- Recommended
- Favorites
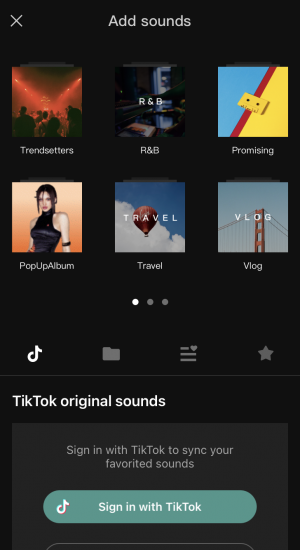
With all these different sounds, it is impressive just how much you can do to bring your videos to life. There is a large library of musical clips which you can choose from, in addition to your own music library. Then, for added effect you can add sound effects (such as a cheering crowd or applause) and finally, for that documentary-style video, you are able to add your own voiceover.
Even more features?
While it may seem that just from the outset there are a lot of options available, things get a little more involving when you touch any clip (or clips) that are on the timeline. When you do so, you’re given the following parameters with which you can modify said clip(s):
- Split
- Speed
- Volume
- Animation
- Delete
- Remove background
- Style
- Extract audio
- Edit
- Filters
- Adjust
- Enhance
- Mask
- Chroma key
- Overlay
- Replace
- Stabilize
- Opacity
- Voice effects
- Copy
- Reverse
- Freeze
- Graphs
What about the output?
If you spend any amount of time with Capcut it will soon become apparent just how much is crammed into this fairly “simple” editing app. With sections within sections, you can spend some time tweaking and polishing your work until it’s just right.
The biggest surprise however is, that even when 4K footage is imported, the application itself can only export at a maximum of 1080p (2K) or lower. This omission is a little peculiar, but perhaps it is the result of the necessary processing power required to handle bigger image files and the software makers not wanting to overload the app.
The takeaway
Considering the parent company behind Capcut, it is easy to see that this application is a creative companion piece to its other hugely popular property, TikTok. Capcut puts many, many powerful editing tools and features in a fairly intuitive and easy-to-use package to help its users create the best possible content that can reach the widest of audiences. And, as we’ve already mentioned, it does all this for free.

