Afterlight - Photo Editor
Link:
https://play.google.com/store/apps/details?id=com.fueled.afterlight
https://apps.apple.com/us/app/afterlight-photo-editor/id1293122457
Name: Afterlight – Photo Editor
Category: Photography
Company: Afterlight Collective Inc.
Number of installations: 10M+
Reviews: 1.2M+
Score: 4.3
Description:
When you visit Afterlight’s website you’re greeted with a message that best describes this photo app – Mobile Photography Simplified. Written in a large and clear font, it is literally the first thing that grabs your attention when the page loads.
The application itself comes with a little less fanfare, as it offers a clear and well-thought-out interface that will be welcomed by enthusiast photographers. When you first open the app, you’re greeted with a few standard messages regarding access to your photo library, but once you’ve gone through those, you’re greeted with a simple interface that has your photos displayed in the center of the screen, along with a couple of navigation buttons.
On the top, you have three lines that reveal general information about the application and developer. On the bottom you have the three most relevant buttons, from left to right:
- In-built camera (camera icon)
- Camera Roll
- Settings (cog icon)
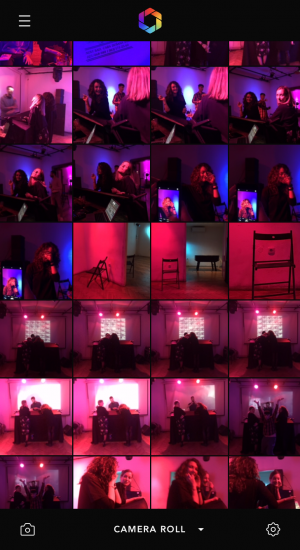
This is where you gain access to all the features the app has to offer, however, be mindful that like many photographic applications today, you’ll have to pay for the privilege to gain full access. In the case of Afterlight, it is referred to as a membership, but the standard offering isn’t light on options either.
As it defaults to your Camera Roll, you can immediately choose an image to edit or you can use the in-built camera to take the shot that way. Keen photographers will be pleased with the number of adjustments possible with the in-built camera.
Most of the main shooting options are found at the bottom of the screen and they are:
- Selective focus
- Exposure control
- ISO control
- White balance
- Auto

At the top of the screen, you’ll find some additional features:
- Flash control
- Self-timer
- Grid/level
- White balance indicator/lock
- Reverse camera
As you can see in the picture above, you can easily return back to the previous screen by hitting the small “x” or you can toggle additional camera options by clicking on the cog on the right. This will reveal two more settings to toggle:
- Start the app in Camera Mode
- Autosave to Camera Roll
The business of taking photos with this app is one of the most pleasant surprises as it offers minute adjustments to all of the above-mentioned parameters.
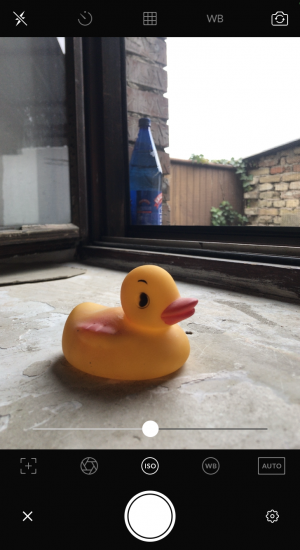
Whichever option you choose, you will get a horizontal bar appearing above the buttons which you can toggle left to right and adjust the settings until you’re satisfied with the result. The three main options that most photographers use are placed in the center, exposure ISO and white balance, right above the big white circle (trigger) used to take the photo. All the changes happen in real-time and you can see your image either getting darker or brighter depending on the parameters you adjusted.
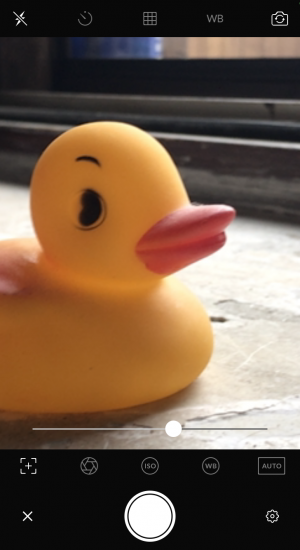
The most interesting of these features is the selective focus that is the first option on the bottom left. When you start to move the slider, the image will then zoom into that section and will allow you to fine-tune the exact point of focus until everything is sharp and you can then take the photo.
If the photo you wish to modify has already been taken, then you would simply choose one from the camera roll and you’ll be taken to a new screen with some additional functions found on the bottom of the screen in the form of symbols:
- Image rotation
- Adjustments (brightness, contrast, sharpness etc)
- Filters
- Special effects
- Text and artwork
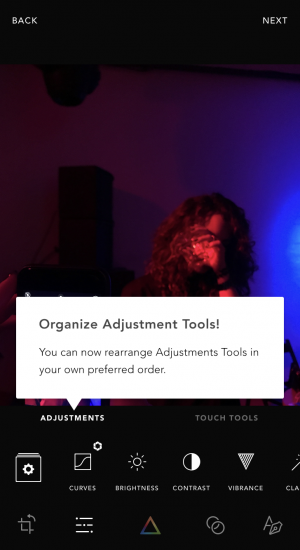
It is in this section that we encounter the full range of options that are available to the user, with some notable exceptions (without a membership). Those which are only available through a paid membership are indicated with a small aperture icon in the top right corner of the option, as seen above.
When it comes to Adjustments, the following are only available through a paid membership:
- Curves
- Clarify
- Glow
- Structure
- Grain
- Color overlay
- Gradient
- Selective Saturation
- Selective Hue
- Selective Lightness
As far as the filters are concerned, you’ll encounter a similar situation, where quite a few are available to use for free, but many more are there for paid members. One notable feature of the filters gallery is the so-called Fusion Filters which are submitted by other users of the platform.
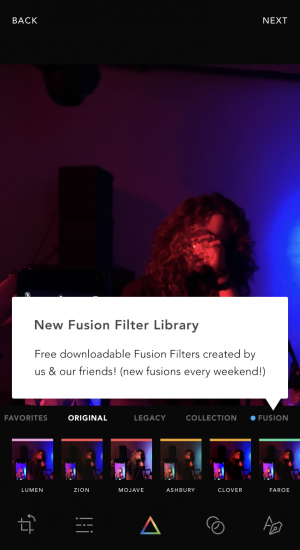

Afterlight strikes the right balance with the kind of functionality that photographers prefer and the ease of use that casual users can embrace. There are plenty of features available for free and the paid model is quite reasonable when compared to some other applications, like Photoshop Lightroom.
WE LIKE:
- The in-built camera functionality
- Fusion Filters
- Clean and simple layout
WE DISLIKE:
- n/a
